Meatball on Twitter

Monday, August 31, 2009

Spray Varnish: How I beat the frosting effect!


Ron asked the members of the FTW blogger group to post some of our thoughts on spray varnish and how to deal with frosting.

In the past I had come across the problem of frosting after using a spray varnish. I asked around my gaming club on how to fix the issue and what caused it. I was told that it is caused by high humidity or overspraying and the number 1 recommended way to fix it was to do a clear coat followed by another matte coat.

While their method did fix the frosting the miniatures still looked different from ones I had sprayed without frosting. I started doing some research online and found many art students recommended using Krylon Matte Finish.

I picked up a can and it worked beautifully. I have been using the Krylon Matte Finish ever since. As of writing this I have yet to get a frosted model in about 4 years of painting minis and using this product. The instructions on the can still recommend not using it in high humidity, you can apply a second coat in just 2 minutes and the models are dry in 10-15 minutes.

I have had allot of success with this product so I just wanted to pass it on to my fellow gamers. I still pay attention to the humidity before I spray but this product has worked like a champ in 102 degree Texas summer heat. It costs around $5-6 a can and can be found at various stores from Walmart to hobby/art supply chains. You can find more information about this product at http://www.krylon.com/

-BJ

Thursday, August 27, 2009

Ork Kommando Conversion

Well I have been working on some Ork conversions this week so I haven't done much painting. Today I used some older Orks bits I had as well as some left over leaves from my GW trees and thus a unit of Ork Kommandos are born. Let me know what you think.

-BJ


Sunday, August 23, 2009

Tzeentch Terminator Lord Finished

I finished my Tzeentch Terminator Lord on Saturday so I thought I would post a few pics of it for all to view. I am very pleased with the sword conversion. I think it will work perfect as the Deathscreamer when I use the model as a Tzeentch Lord but will work equally well as a force weapon if I choose to play him as a Terminator Sorcerer Lord.

All I need now is to pick up some Chaos Vehicle bits to convert the extra Imperial Rhinos I have to Chaos and I will be able to run my Disciples of Tzeentch list.

As always thanks for taking the time to read my blog. I appreciate any and all comments.

-BJ


Friday, August 21, 2009

Friday Project Update - Tomb Kings

Since my family was visiting I had a slow week of painting but I did manage to get some minis painted. To the left you can see my mounted Liche Priest. He was actually pretty easy to paint and I should not have delayed in painting him for as long as I did. In my army he runs with some mounted archers and is a harassing unit, but if he is need to rez troops he has the speed to get back into range where he can be useful.

The unit to the right is a 20 strong group of Skeletal Bowmen. This unit was a fully painted unit of Spear men, I spent the week removing their spear arms and their shields. I then attached the archer arms. Once that was done I just had to paint the new pieces and my new unit was ready to go to war.


Well that is all for this weeks update. I am currently working on finishing up my Chaos Terminator Lord and should have pictures of him for tomorrow's post. Thanks for taking the time to read my blog, all comments are welcome.
-BJ

Monday, August 17, 2009

Marshal with Jump Pack Conversion


I was messing around with a few army lists over the past week and I have decided to add an Assault squad to my Templars. Who better to lead the squad than Marshal Kilburne, the leader of my Templar Crusade Force. So I get to build another version of my valorous leader. I chose to equip him with a jump pack, a pair of lightning claws, bionics, and an Iron Halo. Now I had to pick a model to use a a base for the Marshal. I decided on the Vet. Space marine shown to the right.


I started out using my clippers to remove the model's helmet. Once I had enough of the helmet removed, I then began to work at it with my trusty Dremel. I used my Tungsten Carbide Cutters and continued to remove the remainder of the helmet. I did have a few slips with the Dremel and ended up scuffing some of the armor surface as well as the collar, but nothing i couldn't fix with some greenstuff once I had finished.

Once the Helmet was removed I used the same tool to drill a hole for the head placement. After I had my hole drilled out I then smoothed out the rough cuts on the metal.


I had 3 different heads picked out. One was the Space Wolf Head with the short hair, the other was an actual Templar Marshal head and the 3rd was the Tact. Squad Sgt head. I chose the last one because it looks like it has allot of bionic components therefore could represent my bionics wargear.
After a few additional clippings of the head and the body to get the fit right I then attached the head to the body and waited for the glue to dry.

My next step was to use greenstuff to rebuild the damaged portions of the power armor collar. I decided to leave some of the scuffs on the armor itself as battle damage. Once I was satisfied with the rebuild of the collar, I moved on to attaching the arms and jump pack.

I decided to use the same arms that came with the model, but I chose to reposition them from how the original pose was. I had to clip the arm fitting and use some greenstuff but I got both arms to point down as I wanted. Next I attacked a spare jump pack and then I clipped the Iron Halo off my extra Assault of Black Reach commander and glued it onto the jump pack.


Here is the model in its current state. I still have some work to do on the collar but over all I am happy with how the model is turning out. I still have some other Templar bits I will be adding but soon Marshal Kilburne will be ready to lead the Assault Squad into battle.
Well that's it for now, I will keep the blog updated on this model's progress . As always comments are welcome.
-

BJ


Monday, August 10, 2009

Flaming Sword for Tzeentch Lord


OK this was going to be a tutorial showing exactly how I did this conversion but only 4 of my pictures were worth posting. I will go into as much detail as I can on how I did the conversion and strive to take better pics next time, or at least double check their quality at each stage.

I had originally made this model as a Tzeentch Sorcerer Lord but decided I wanted to run a list with a Tzeentch Lord wielding the Deathscreamer. Since One of the descriptions of the Deathscreamer was as a sword of fire, I decide that I could convert this mini in a way that he could be a Lord with the Deathscreamer or a Sorcerer Lord with a Force Weapon.

As you can see I had already started painting the mini before I made this decision so I had to remove the staff that he was originally holding and find a suitable blade to build the Deathscreamer with. I found a bit on my Chaos Knights sprue that had a cool shape and a daemon face on it. I removed the blade from the knight hand, then I removed a grip and pommel from an axe on the same sprue. Next I took my time and lined up the sword how I wanted it. I then pinned and glued it in place. I didn't pin the grip and pommel and opted to just glue it on, a mistake I would come to regret later.

I apologize for not having any pics of the next few steps. Next I rolled a thin log of greenstuff and applied it to the edge of the sword where I wanted the fire. I then made the basic path I wanted the flames to travel up the sowed and even off the edge. This had no detail at all it was a template, flat on both sides of the sword with the basic area I wanted the flames to go. I set the model aside and allowed the GS to cure over night.

The next step was to begin sculpting the flames on one side of the blade. I rolled 3 small balls of putty and placed one at the base of the sword. Using my sculpting tool I then began to shape the flames by dragging the tool up and out away from the base of the sword and using my GS template as a guide for where the flames would travel. I continued to make flames until the ball of GS ran out. I then grabbed the 2nd and 3rd ball of GS and continued sculpting the flames up the inside of the sword. Once I was happy with the basic flame shapes I then went back and sculpted in more details.

During this stage I went on the Internet and found pictures of flames. I had these up on my monitor while I sculpted the details of the flames. Once I was done I set the model aside to allow it to cure.

The next day I repeated the same step to the outer side of the sword, the only difference this time is I had to blend the flames together with the inner side that I had done in the last step. Once that was all finished I set the model aside again allowing the GS to cure.

If you take a close look at the last pic, you can see where I broke of the bond holding the grip and pommel. 
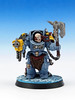
I cursed myself for not pinning it and then proceeded to pin the damn thing in place.

I enjoy doing conversions that allow me to use the model in a few different ways. With this model the weapon will easily work as either a force weapon on a Sorcerer Lord of a Daemon weapon on a Lord.

Now the model it built and I can get to painting it. I have not decided yet but I am leaning towards either blue or green flames on the sword. Green would really stand out and I have used it on the weapons in other parts of my Tzeentch army, but in my head blue keeps looking like a good choice.

As always thanks for taking the time to look over my blog. All comments and feedback are welcome. I wish this could have been a better tutorial but hey I learned from it and I will do better next time.


-BJ

Sunday, August 9, 2009

Projects Update

Time for another projects update. First up as you can see by the picture I have completed the Dwarf Grudge Thrower. I would add more detail to it but I need it to match my Dwarf Army so as it is right now they are a match. I may one day go back and use some washes on all my Dwarfs but for now I am one step further to having all 4K points painted, all I have left is a unit of Quarrelers, a unit of Rangers and 3 special characters.

I got sidetracked this week with a Tzeentch Chaos Lord conversion (more on that tomorrow), so I didn't get anything else finished this week. My Templar Crusade Squad is about 50% painted which leaves me with an Assault Squad, 6 heavy/special weapon troops, a Rhino and a Predator until that army is complete.

I have a 15 strong squad of Blood Claws for my friend that is about 25% done. I Still have another 20 or so of them and then some Long Fangs. My Tomb King skeletons are about 90% finished and I haven't begun any of the other models listed on my projects page yet.

Well that pretty much gets things up to date. Now I must get back to some painting. As always any comments are welcome.

Tuesday, August 4, 2009

Small Space Wolf Project


Well with the new Space Wolf Codex a couple of months away my buddy Brandon asked me if I could paint him up some more Blood Claws to go with the Space Wolf army I painted for him 2 years ago. I was actually looking forward to being done with Marines for a little while, but he is a good friend so I took the job.


I asked him to send me a few of the minis I had already painted so I could match the style and colors as he wants the army to look uniform. Today I made sure that I remember all the colors I used and that I had fresh pots of each. So now I just need to prime they and get to work.


I have noticed something while trying to get all of my half painted armies completed. I can see from the oldest army to the most recent how my painting style has changed and grown. It is a challenge to try to match older models I have painted, as I have to remember what techniques I used on them.

So I am sitting here looking at these Space Wolf models and I realized I used allot of dry brushing, almost no blending or shading and I can see the heavy use of ink on the faces. It was pretty cool to see how much I have learned about painting in the last 2 years, but also realized it was going to be a challenge to get the new models to match the old style.


So as soon as I post this I will be off to prime around 30 Blood Claws. I will still have a Character model or two and some long fangs but I wanted to get the bulk of this project completed first.


I am going to do my best to make the models match the old while I incorporate some blending as well as washes into the new models. I keep the blog updated as I work on this project.

Sunday, August 2, 2009

First Project Update for August


Today has been pretty productive so far. I have finished both of my Screaming Skull Catapults for my Tomb kings. I have one that is loaded and pulled back, waiting to fire. The other has just released it load of skulls and awaits being reloaded.

I also managed to finish two Veteran Sister Superiors that I converted into holding Books of St. Lucius. I only pictured one since they both look pretty much identical. I am now moving on to finishing my Dwarf Grudge Thrower and crew, once that is finished I think next on deck is my final Templar Crusade squad. OK time to get back to painting.